The second part of this Tarangus SAAB Lansen build from Eth and this kit
which looked a bit basic is starting to turn into something with potential –
today Eth takes us through the major construction of the fuselage and how to
fix any problems that occurred along the way. The promise of this kit is developing!
Scale: 1/48th
Kit no: TA4801
Sprues: 5
Parts: 80 grey
+ clear Parts
Material: Injection
moulded plastic + PE Parts in the Maestro Add-on kits
Where to get it: Tarangus website directly
SAAB A32 Lansen A Build Pt. III
SAAB A32 Lansen A Build Pt. IV
SAAB A32 Lansen A Build Pt. V
SAAB A32 Lansen A Build Pt. III
SAAB A32 Lansen A Build Pt. IV
SAAB A32 Lansen A Build Pt. V
With the cockpit finished and ready to be installed
it was time to add the sub assemblies for the intakes and the exhausts.
These were straight forward to assemble although the fitment to the fuselage is slightly problematical due to the lack of positive fixing point, but nothing that an experienced modeller cannot overcome.The wings butt up to each other and have some horrendous sprue attachment points that need careful removal, both from the sprue and the wings themselves.
Because of the nature of the butt joint of the wings
there was always going to be the risk of a visible gap and the above photograph
demonstrates that. However it is easily dealt with and using Squadron green
putty the problem was soon over come.
One task that you must do at this point, if you are
using the etched speed brakes, is to open up the speed brake panels on the
fuselage. This was accomplished by using a small drill in a pin vice to outline
the panels that needed removing, there are four in all, two on the sides and
two underneath.
There were some problems when assembling the two
halves of the fuselage. For some reason a lot of material had to be removed
from the cockpit tubs and the sides of the fuselage before the two halves would
come together properly, and even then filler was need along the whole join.
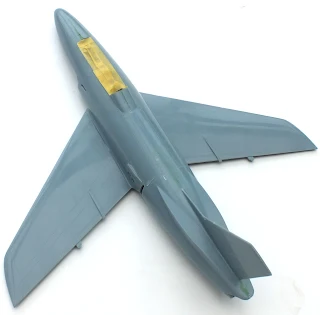
With everything glued, filled and sanded it was time to prepare the model for painting, which will be in the next instalment
With everything glued, filled and sanded it was time to prepare the model for painting, which will be in the next instalment
Ethelian
Glendawr
SAAB A32 Lansen A Build Pt. III
SAAB A32 Lansen A Build Pt. IV
SAAB A32 Lansen A Build Pt. V
SAAB A32 Lansen A Build Pt. III
SAAB A32 Lansen A Build Pt. IV
SAAB A32 Lansen A Build Pt. V
Thanks
to Tarangus
for this kit and the extra additional etched add on parts more of this
build very soon right here - stay tuned.


