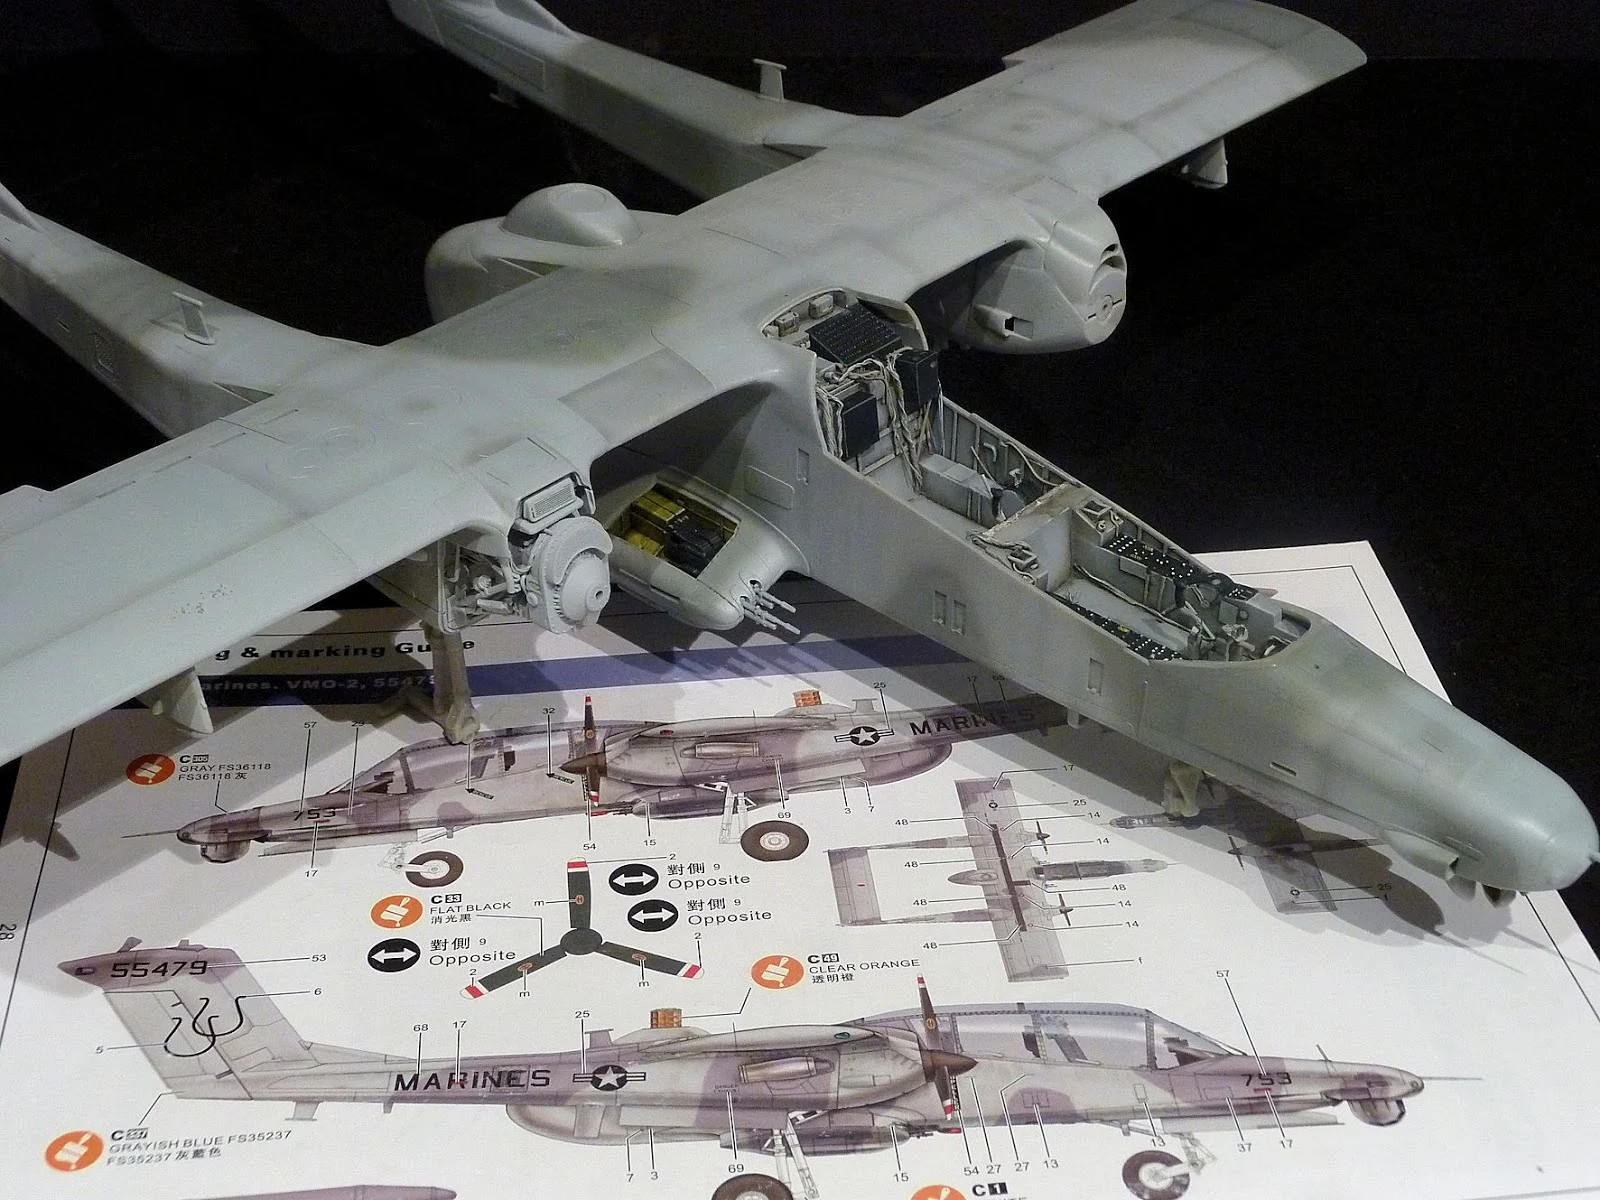
Kittyhawk’s
latest kit of the OV-10 Bronco is
half completed on François and Nic’s combined working bench. This 32nd
scale kit has already been constructed and we have seen some delicate cockpit
and engine work – now for painting and weathering this cool looking aircraft. All
this and final thoughts in Part II in this build.
.jpg)
Build Review: OV-10D
Kittyhawk Models
KH32003
1/32nd scale
Available through Kittyhawk’s Distributors Worldwide
Part I the build is here
We’re back with the Bronco! In our first part of the build, we left off when the construction was about done and the cockpit and canopy were masked off…
To paint the Bronco, we only needed to use 4 shades of Revell Aqua Color: Light Grey 76,
Medium Grey 43, black and white. We mixed quite a lot of shades with these 4
colours to get some life in the kit, though.
First up: a layer of
Hellgrau and white.
Next was a mix of Medium Grey and Light Grey to get the camo
on. We mixed the paint with simple tap water – it’s surprising how easy this
paint works!
Some panels received a different shade and with some very
thin layers, some streaks were made on the fuselage. Livens thing up a little,
doesn’t it?
Post-its were used to mask off some panels and with a highly
diluted mix of medium grey and black, panel edges were sprayed.
After this, the kit
looked a bit too artificial, so a little freehand post-shading was done.
The vertical tails of this Kitty Hawk release are very
nicely done with beautiful casted panel lines and rivets, but also with some
raised panel, just waiting be be weathered. This is what the starboard tail
looks like, just painted.
The cockpit looks not bad
inside a painted fuselage...The basics are good but you can see that the extras we added (probably not unlike they did in the real thing) add so much more detail and allow for colour variation and bring a lot of interest to this area.
Around this time, some of the other parts got a coat of
paint as well: engine covers, landing bay doors, canopy parts...
The bronco is about painted here, and because the layers go
on very thin, there is still loads of paint left. Although it isn't used in a lot of builds you might see I think I like this Revell Aqua Color – it
sure won’t be the last kit that will be painted with it!
Next: a layer of future. I always use a big flat brush to do
2 or 3 layer to make sure the finish is smooth for the decals. The instructions
will guide us for the right position of each decal.
The decals provided by Kitty Hawk are extremely thin, and
just like with the T-6 very fragile. If you’ve never built a kit from this
brand, make sure to be careful with them. The decals are nice, but maybe just a
little too fragile for my taste; once on the kit it is hard to move them and
make sure they don’t fold before they are on the kit, because very hard to
unfold them. Again: very nice once on the model, but care has to be taken when
handling them!
Because they are extremely thin, the decals settle in every
little detail: in every panel line, rivet of recessed detail.
With all decals placed, another couple of layers of future
is brushed on. Now we were ready for the weathering?
Sometimes thing get really "dirty" and so a wash was
applied with Winsor & Newton water colours. All you need is a good, soft
brush.
I used to do every panel line carefully, but that’s a bit
silly actually. Nowadays, I just make a big mess and let the paint dry
completely before I remove all the excess with a damp cloth.
No need to go easy...
When you wipe off the excess paint, every little panel line,
rivet and detail will be visible to good effect. This is where you see how
nicely detailed this new Kitty Hawk kit really is!
All the separate painted parts get the same treatment.
Moments after this photo was taken, we lost one nose wheel door. No dog in
sight, just Nicolas. I’m sure he didn’t eat it, but even after going through
his entire office, no door was found. Only one thing left to do: scratch a new
one!
All the canopy parts got their share of wash and weathering
too!
With the kit painted and first weathering done, parts like the canopy framing and the gear received some attention (and extra scratched detail).
How ‘bout those legs?
The main gear got detailed, painted, washed and chipped.
Here is the front port canopy window all detailed and
painted. This will look good on the finished model!
While this was being done, François painted and weathered the weapons we
were going to hang under our Bronco. We think the sidewinders especially turned out very nice;
each missile consists of 7 parts! It’s a bit of work, but they have a very prominent
position on the model, so it’s worth the effort.
François did a stellar job on the tiny engine exhausts.
First Alclad II metal paint, followed by transparent layers of brown and blue.
Next a wash and some weathering with this as a result:
Painting the engine is a little tricky, because you can only
do this when the kit is already painted. So, careful masking is required. We
added quite a bit of detail to the engine, and with some patience, the effort paid
off!
It was about time to
start sticking on the details of the kit now... still have to do the front gear
though.
Landing gear and
doors go on...
The engine’s looking good
too by this stage - painted chipped and weathered with fuel stains and grime it really is a great looking attribute on this kit.
We noticed in a picture of the real Bo No. 55479 that we were depicting that the antennas
were painted black, so we had some last-minute masking and painting to do.
Now it was about time to get the last details done and glue
the canopy windows with all their detail. Very fragile work, so in came the aid
of Dr. Pepper!
Cockpit looks good underneath the glass roof, no? See the
nice pull-down steps and the remove before flight tag in the cockpit? Those came from Eduard. Details like this and the extra work we added into the base cockpit adds so much to a completed kit. You do not need resin aftermarket to make this kit stunning - just some hard work on the bench.
There was one guy in the team responsible for the remove
before flight tags, and boy did he put a lot of those! Here he is ready to hang
on yet another one!
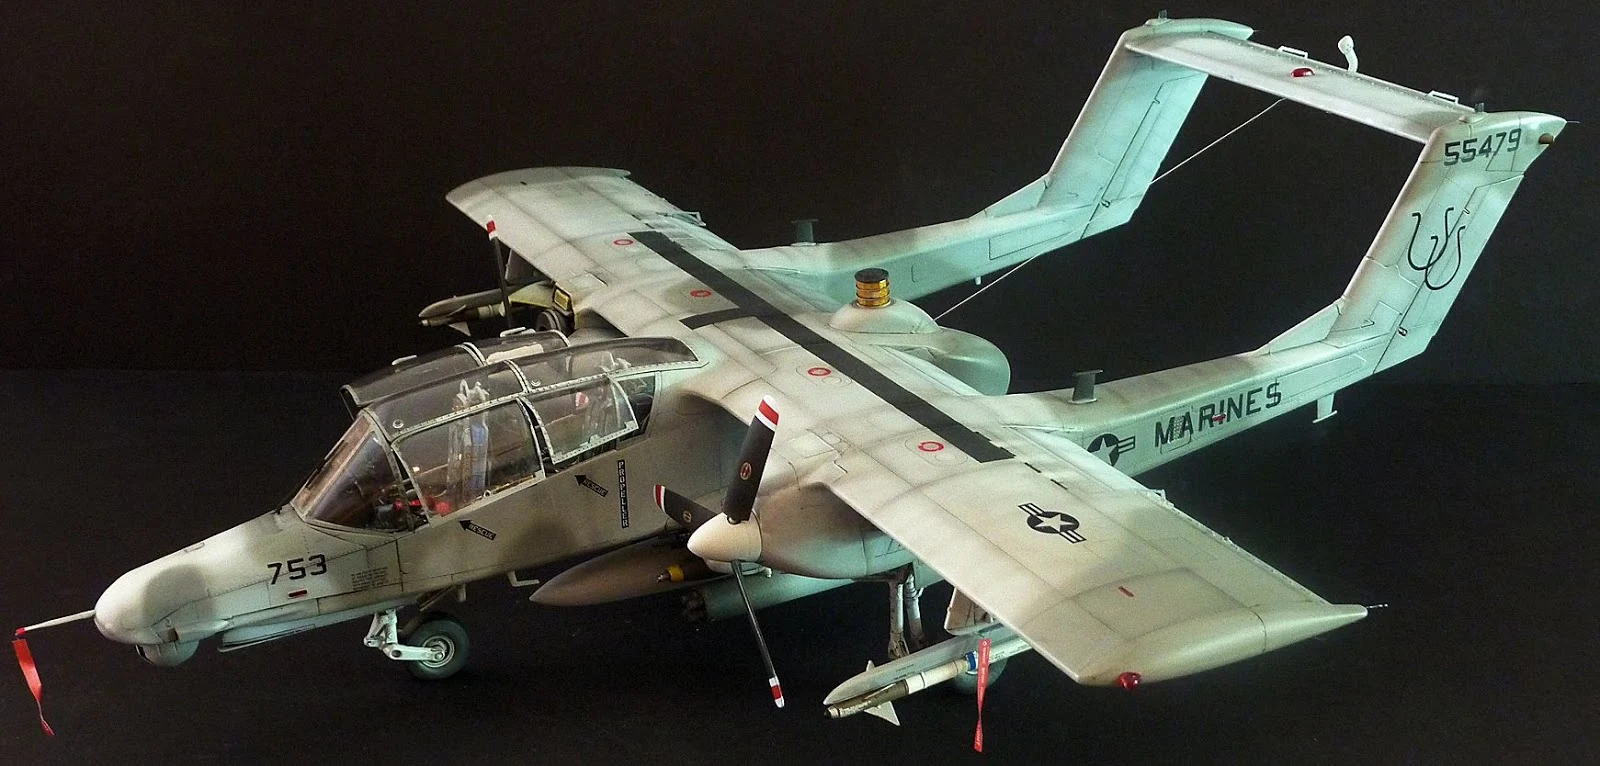
So, when he was done, the kit was done as well. This is what
Kitty Hawk’s Bronco looks like after a couple of weeks of hard work:
This 1/32 scale Bronco is simply the best kit Kitty Hawk has
produced so far. Mind you, it is a handful – it’s not a walk in the park like
some other kits are. This is the second twin boom aircraft I’ve done and each
time, it was a lot of work, but boy, do they stand out!
Kitty Hawk has done a marvellous job with the Bronco, but as
you have seen, a lot of detail can be added to the glasshouse cockpit and
canopy. We had very little trouble with the construction of the kit, but here
are just a couple of hints for those of you that have one in the stash or on
the wishlist:
- Make sure the wing is strong enough – we used a brass strut and we’re very happy about it. The kit can use some extra strength.
- As with all Kitty Hawk kits, take care with the decals. Very nice, but sooooo fragile...
- Make room in your display case, because this will be a centrepiece!
We felt very lucky to have the opportunity to build this kit.
The Bronco is such a cool looking aircraft, especially the long-nosed variant.
With this one done, might we suggest to do another odd-looking ground support
aircraft in 1/32 to Glen of Kitty Hawk? How about a Mohawk in this scale? Now,
wouldn’t that be something wild?
Thank you for following us in this journey of “Taming the
Bronco” and also A very big thank you to Kittyhawk
for sending us this review kit as well as to Revell for the Aqua Colors and brushes which we used in this review
Text by Nicolas
Deboeck
Model by: Nicolas
Deboeck & François Laloux
Postscript:
One of the model builders François, took the kit to the modelling convention in Antwerp this weekend and we won 4 different awards with it! First in its category, best aircraft in competition, and two special awards from two dealers. Just goes to prove that this kit out of the box with just some wiring and a few details added is a great kit.
One of the model builders François, took the kit to the modelling convention in Antwerp this weekend and we won 4 different awards with it! First in its category, best aircraft in competition, and two special awards from two dealers. Just goes to prove that this kit out of the box with just some wiring and a few details added is a great kit.
Thanks to Kittyhawk
for sending this kit to us to make – it is available through Kittyhawk’s Distributors Worldwide
Revell model paint is
available from all good toy and model retailers. For details visit www.revell.de/en


