Andy Moore has already shown us this kit from Takom in both
an in-box review and a construction build. Today he paints and weathers his 35th
scale Takom AMX-13/90 in an interesting Venezuelan colour scheme. With the
introduction of the Tamiya kit of the AMX-13 does Andy think this is the best
on the market? Let’s see as he wraps it all up..

In-Boxed: AMX-13/90 French Light
Tank
Manufacturer - Takom
Kit Number - 2037
1/35th Scale
Price - £31.90, ¥5,400, US$45.52,
€42.16 from Hobbylink Japan

This is how we left this little French Fancy at the end of
part 2, all ready to hit the paint shop. But before breaking out the airbrush
there were a couple of little additions I made to the tank.
During the construction I'd added some twisted fuse wire to
the smoke dischargers to simulate the retention chains for the end caps. I
wasn't entirely happy with these as they looked a little crude and out of
scale. So, to remedy it, I picked up some etched brass chain from Aber and used
this to replace the fuse wire.
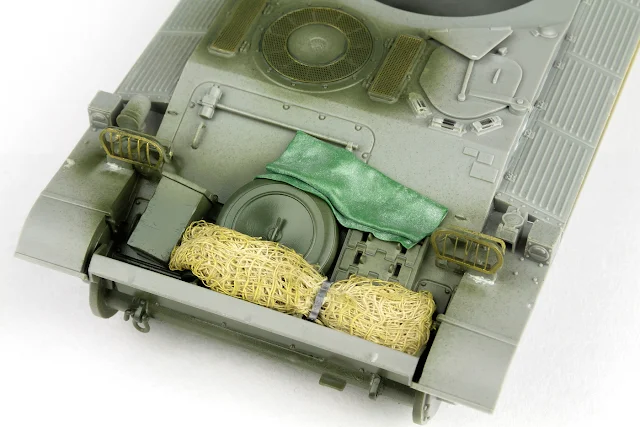
I also added some stowage in the form of a folded tarp,
formed from epoxy putty, and a rolled up camo net. The net was made from cotton
cheesecloth, soaked in watered down PVA, then placed in position and left to
dry. Both pieces were removed and painted separately.
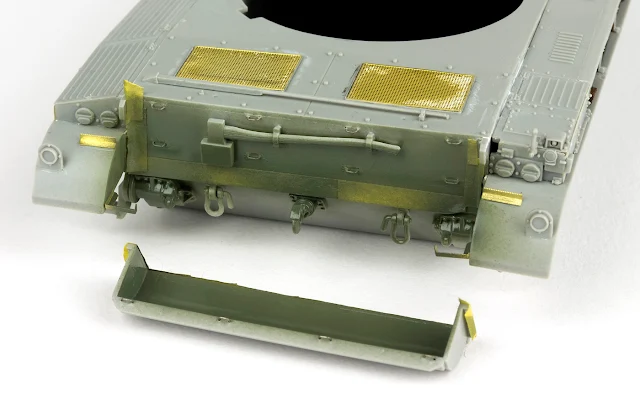
The areas under the rear stowage bin and around the front of
the tank were painted before final assembly, as they would have been hard to
access with the airbrush otherwise.
With everything now ready for paint, it was time to pick the
scheme I'd be doing. I decided to go with the Venezuelan option as it had a
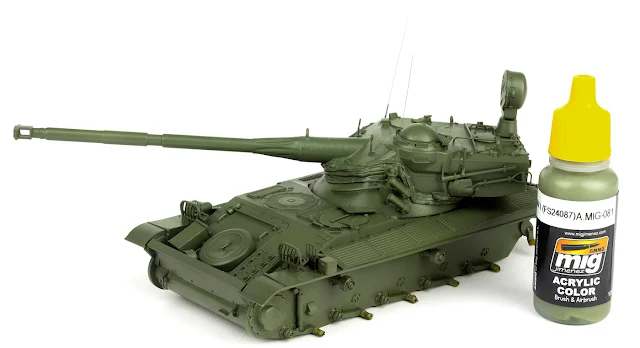
more interesting camo, compared to the two French schemes. The tank was primed,
followed by a base coat of AMMO 081 US Olive Drab.
I added a little AMMO 058 Light Green Khaki to the base
colour and sprayed some loose highlights around the upper surfaces to give a
little tonal variation. Much of this will be covered by the subsequent camo,
but it helps to give the model a little more volume.
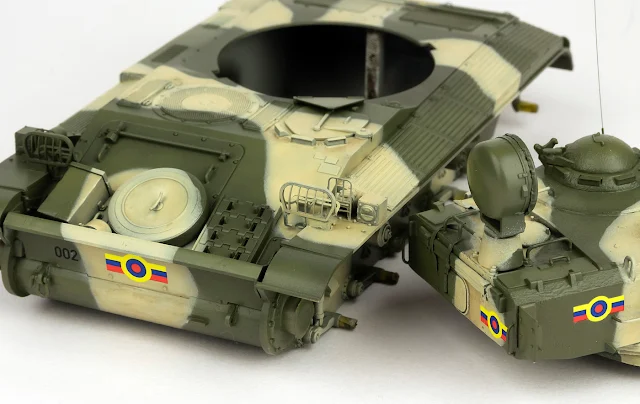
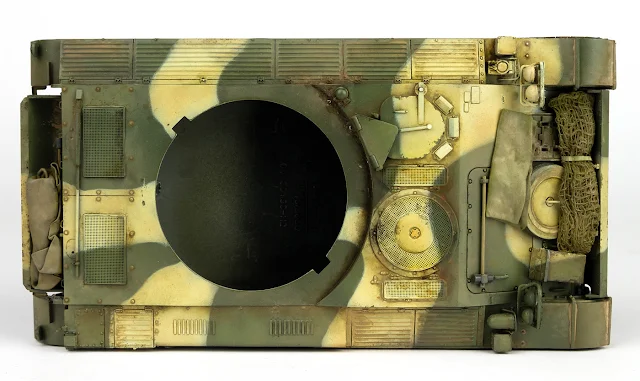
The camo pattern for the Venezuelan AMX is relatively
simple, but the masking is quite involved, simply because there are so many
delicate bits and pieces covering the hull and turret. I masked out the pattern
using silly putty, which is by far my favourite way of masking camo on an AFV.
Unlike Blu-tack, silly putty is very easy to manipulate, and will lift off the
surface without leaving any residue, or damaging fragile parts.
With the tank masked up, I sprayed the sand camo. The
painting guide recommends AMMO 057 Yellow Grey, but to me this looked a little
too pale, compared to photos of actual Venezuelan tanks in this camo. To deepen
the colour, I did a 50/50 mix of the Yellow Grey with AMMO 061 Warm Sand
Yellow. This colour was still quite pale, but this will allow for the weathering
to darken the shade.
The decals could now be added, and the Venezuelan markings
add a nice splash of colour, which isn't something you get very often on an AFV
build. The decals settled down very well with a little setting solution,
although I did think they were a little on the thick side, meaning they didn't
quite achieve that 'painted on' look that we always want.
Once the decals were on, they were sealed with a gloss coat,
and the rest of the detail painting was done. The straps wrapped round the
turret grab rails were made from strips of lead foil. Some subtle paint
chipping was added to the sand areas using the base green.
The stowage items
were also painted up before being added to the model.
The model was then given various washes to add more variety
and contrast to the finish. AMMO Dark Green Grey wash was used as a pin wash to
help bring out the detail while US Modern Vehicle wash, which is a warm brown
tone, was used as a filter over the sand areas to deepen the colour and add
shading around the surface details. The canvas dust covers on the turret and
barrel received extra washes to make them stand out more against the metal surfaces
of the rest of the tank.
Oils paints were now used to further deepen the shadows, and
add more contrast. The paints were placed on cardboard to soak out some of the
oil, then painted around details and blended with a soft brush.
Earth coloured washes were used in addition to the oil
paints to add a dusty, weather beaten look to the finish. The oil rendering and
washes also toned down the gloss coat applied for the decals without needing a
subsequent mat coat, which left a more natural finish.
I could have left the weathering at this stage, but I wanted
to add some mud and dust to the running gear, to depict a vehicle that had been
used in the field. I made up a thick mix of plaster, garden soil, AMMO
pigments, and earth wash as a binder. The mix was loaded on to a stiff brush
and stippled around the lower hull. More of the mix was flicked from the brush
up the sides of the hull to show splattered mud.
Once the mud was dry, I mixed up a medium earth tone from
acrylic paint and sprayed this thinly around the muddy areas. This helped blend
the previous step into the existing finish. The earth tone was also sprayed
around the dust sleeve on the turret and in any other corners where dirt and
dust would accumulate.
The jerry can that mounts on the turret was given a chipped
and rusty appearance using the hairspray technique. It was first primed in a
dark rust colour, followed by a coat of hairspray and a pale green top coat.
The green was then chipped with a damp brush to leave a worn finish.
The tracks were primed in black and this was left as the
main base coat. The drive sprockets, which had been attached during
construction, were painted in the same green as the rest of the tank.
The pigments that had been used for the mud mix were then
applied dry to the tracks, and fixed in place with a thinned enamel earth wash.
The same thinned wash was added to the drive sprockets.
Once the tracks were in place, I rubbed gunmetal pigment
over the ridges of the links, and also over the guide horns and the teeth on
the drive sprockets. The road wheels had a thinned mud mix applied, followed by
the same earth wash as the tracks and sprockets.
At this point, I was ready to call the AMX finished, but
it's always a good idea to let a model sit for a day or two, then come back to
it with fresh eyes to see if any more work needs to be done. In this case, I
thought the dusty earth wash on the turret's canvas dust cover was a little too
dark, and wasn't prominent enough. I mixed up a lighter pigment wash and
applied it over the dust cover, and selectively around hatches and panels on
the turret and hull.
And that wrapped up the AMX build. It's one that, overall,
I've enjoyed, although there were a few fiddly sections during the construction
that were a bit of a hassle. The tracks in particular, being so small, weren't
much fun to build up, and I still think link and length tracks would be more
practical with a smaller subject like the AMX-13. These issues aren't really
faults with the kit itself though, and others may have no problem with the
tracks as they are. Ultimately, it's the end result that matters, and this kit
does build up into a little gem.
Of course, Takom are no longer the only game in town for a
modern tool AMX-13, as Tamiya have recently released their own. I've no doubt
the Tamiya release will be a little easier to construct, but I'm also sure it
won't be able to match the levels of detail in Takom's offering. If you're
prepared to put a little effort in, this kit will give you the best rendition
of the AMX-13 out there.


Andy Moore


