Clayton has finished the combined kits of Takom's 1/35th scale Jagdpanther G1 Early Production W/ Schwerer Plattformwagen Type SSYS over a few parts here on TMN. Today we present Part III of his article where he combines and finishes them off to a great standard in an interesting story...
Jagdpanther G1 Early Production with zimmerit (no interior) limited edition incl the Schwerer Plattformwagen Type SSYS
Today: Build guide Pt III: Painting & Weathering 1/35th scale Jagdpanther G1 Early Production W/ Schwerer Plattformwagen Type SSYS
When last we visited this build, I had started to paint the rail car and primed the Jagdpanther, so it was ready for painting.
The tracks and wheels had been painted and assembled and a makeshift mask using tape and a tissue was placed around the tracks. Here’s a reminder to get you up to speed –
The model is treated to a base coat of AK Interactive – Dunkelgelb from the Real Color range. The tissue mask is removed and set aside to dry.
The camouflage pattern is copied from the colour schemes supplied in the kit as best I could by simply free-hand spraying Rotbraun and Olivgrun in a random manner.
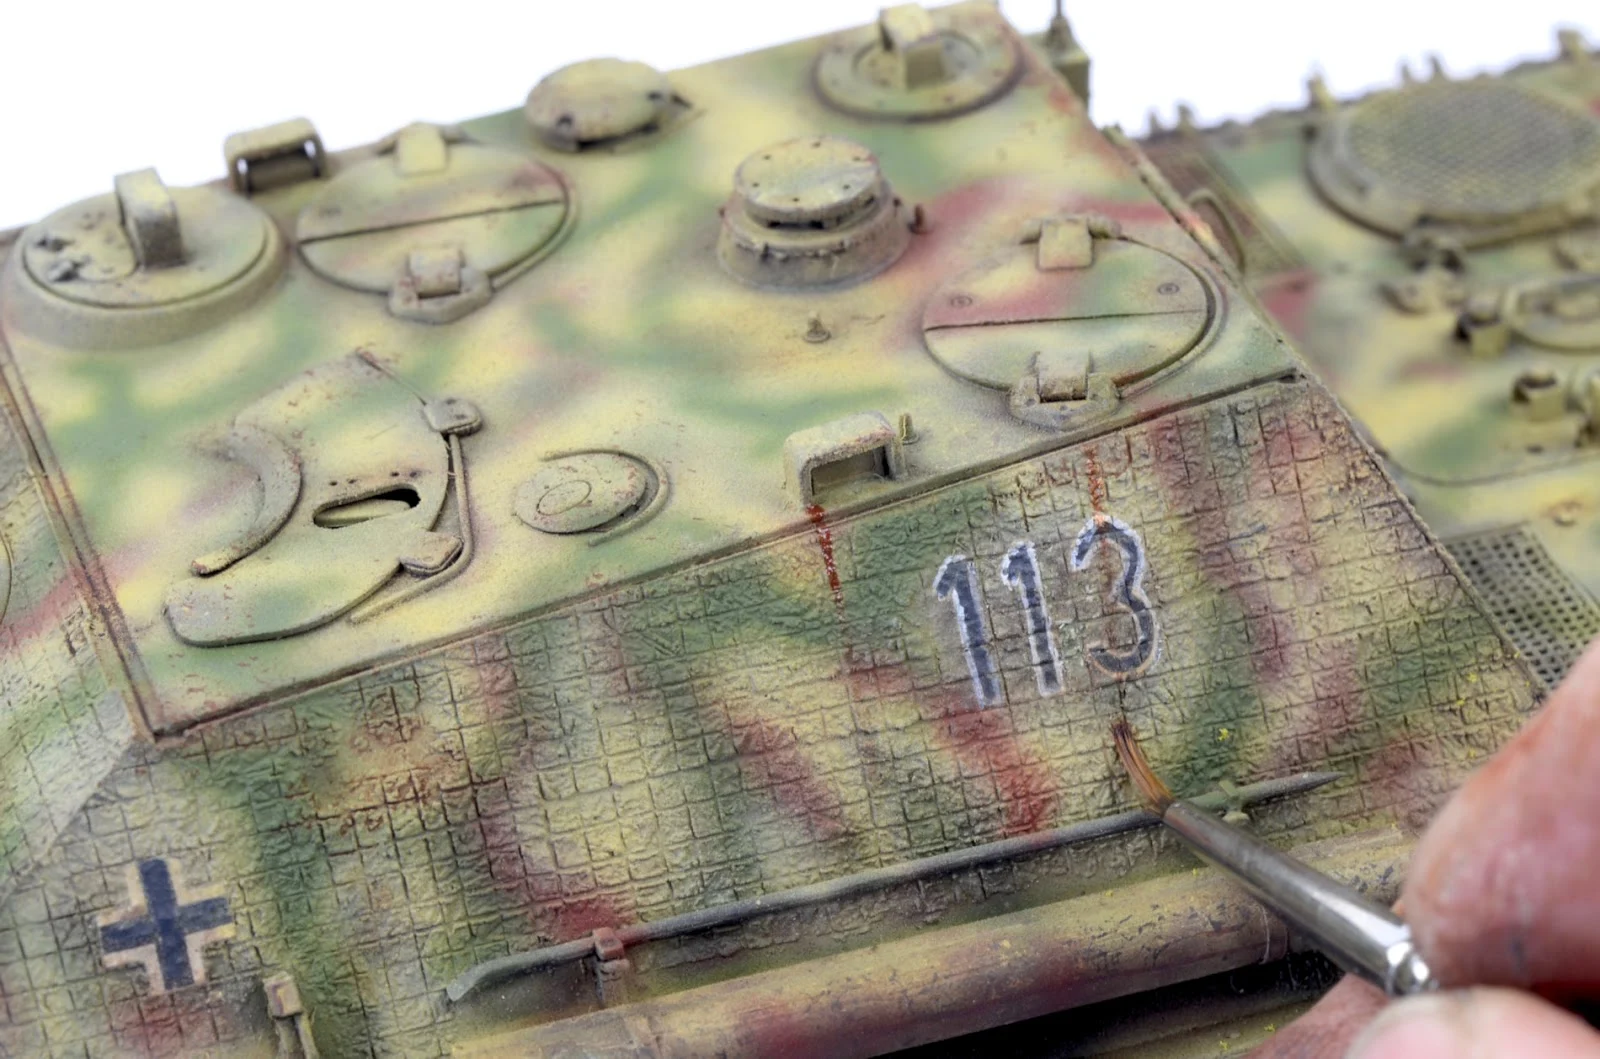
The model is treated with a gloss varnish and the decals are set in place. Given my time again I probably should have set up a mask and sprayed these on because sitting the decals through the rough Zimmerit texture wasn’t ideal and I did encounter some silvering. I was planning on overpainting the numbers anyway in order to make them look a little more ‘field applied’, so I could address the silvering with paint down the track.
Using an irregular sponge and some of the Dunkelgelb colour, superficial chipping was applied in a dabbing motion. I concentrated around logical areas of wear and edges of panels.
The chipping process was repeated using a darker steel colour to simulate some deeper chipping.
Using a heavily thinned mix of Dark Grey and Rotbraun, additional depth was added by creating false shadows in deep, recessed areas and around details.
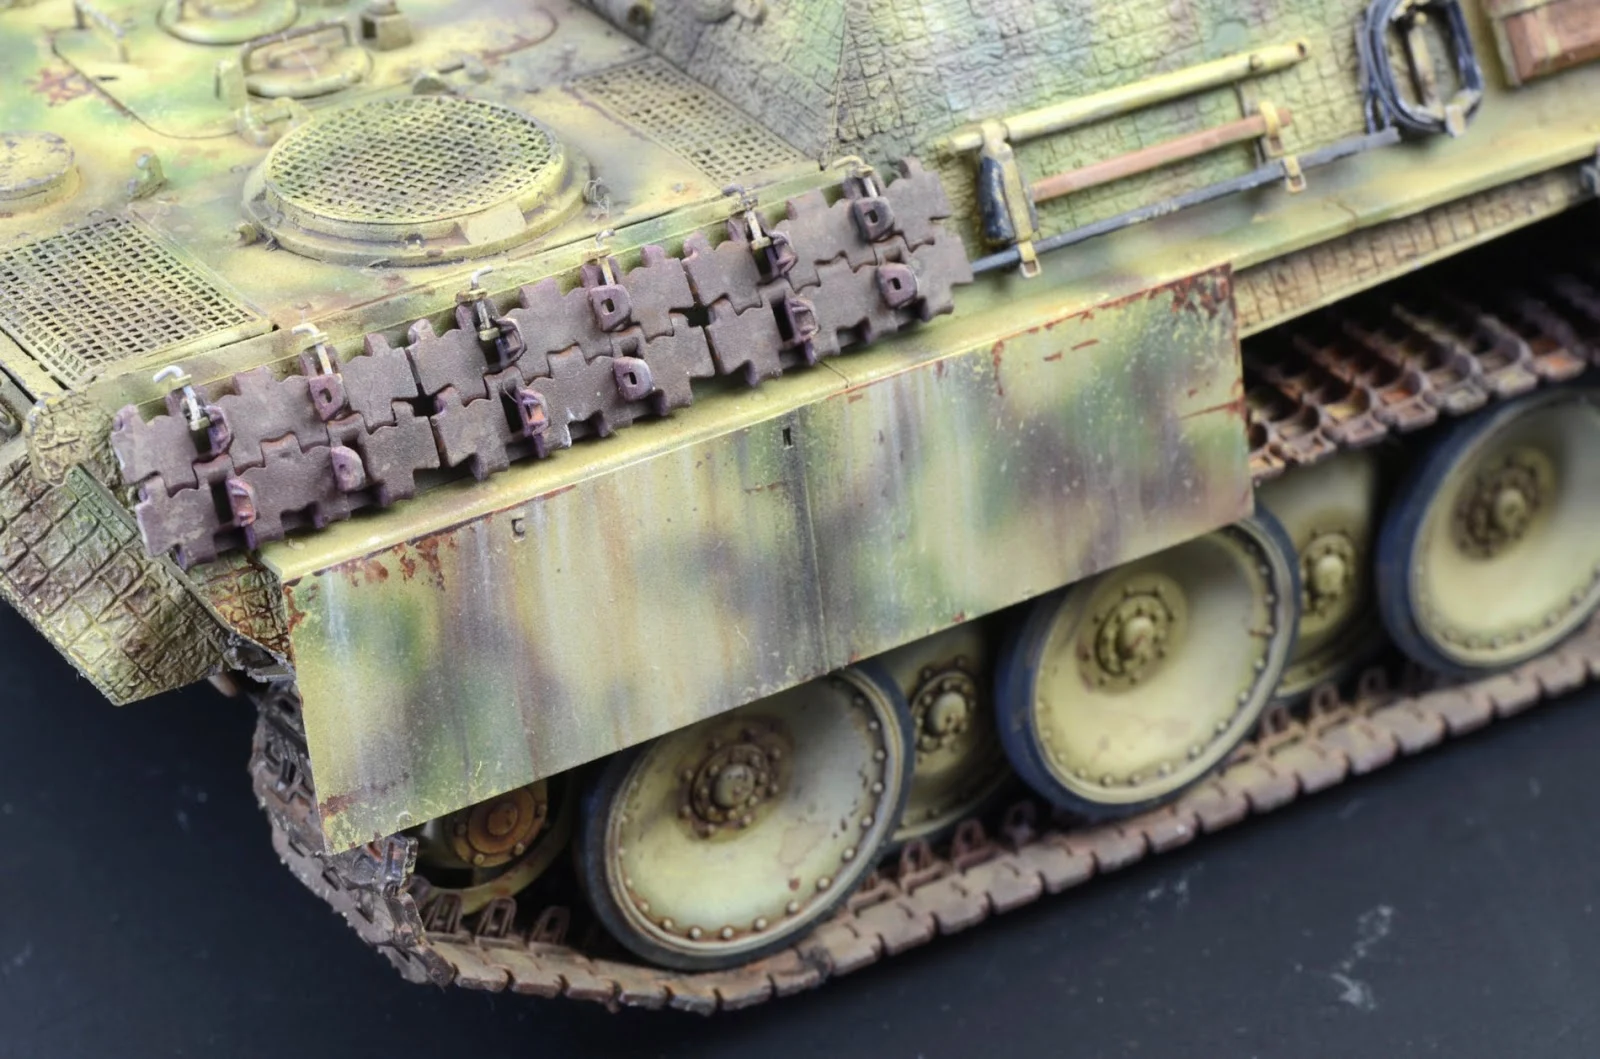
Streaking effects are now applied using enamel paints – rusty and buff colours are applied in fine lines working from the top of the panel down. Then using a flat brush moistened in white spirit the enamel paint is slowly removed by dragging it in a downward manner.
The effect should be subtle and will give a weathered and worn look to the panels you are working it into.
A paste of Earth toned pigment and enamel paints is now mixed up and applied to the model along the lower edges and wheels using an old brush. Very, very messy work…
A thinned Buff colour is sprayed along the lower edges of the model to simulate dust. It’s all about adding layers and creating depth.
In order to give the markings a more ‘organic’ look to them I overpainted the markings using a fine brush. This also gave me the opportunity to tidy up some of the issues I had with the decals silvering.
Further streaking is added to the top edges of the model. Again, using rusty tones of enamel paint and removing them in a downward motion with a flat brush and white spirit.
Exposed edges are now treated with the edge of a lead pencil to help similar bare, worn metal edges.
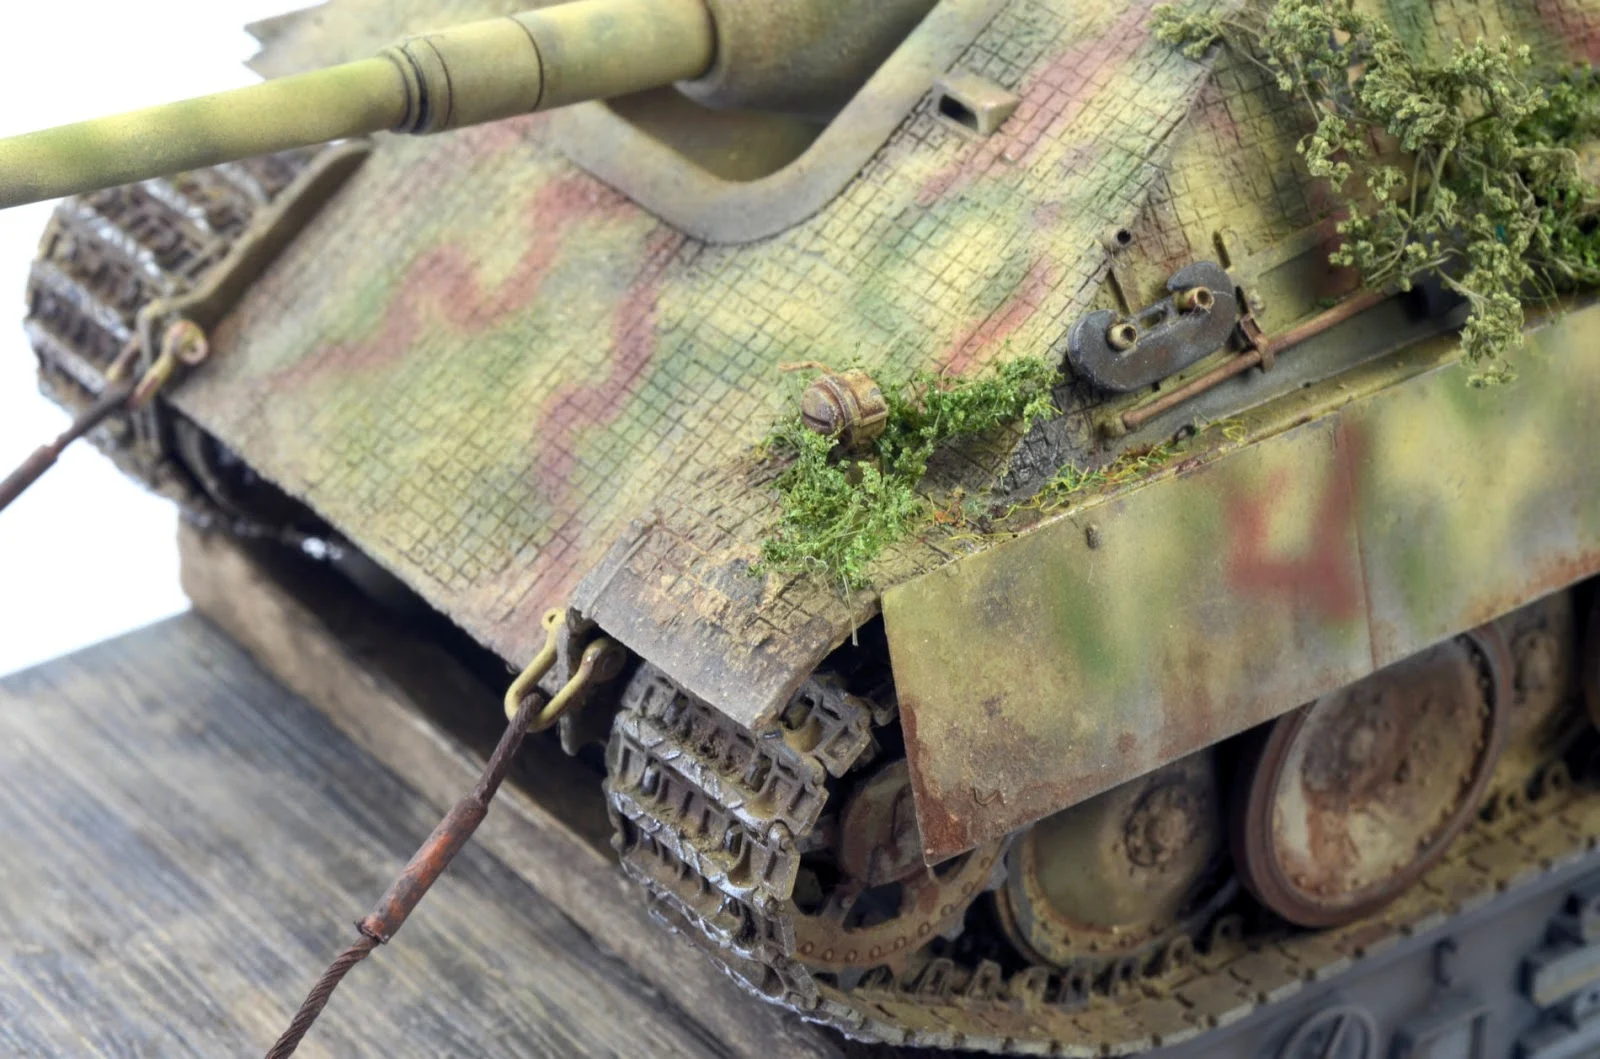
Using a static grass mix combined with some real-life plant material, the horizontal edges are dressed with the material and set in place using Sand and Gravel adhesive.
I had a bit of a roller coaster ride with this model. I had moments where I loved it and others where I was hating it. Hating it as in the direction I was taking it more so than the model itself. More about me than the model.
As mentioned in the build review, there were some fit issues with the rear deck section as well as the way the gun assembly came together with the shell, but I guess that is model building, right? Just be mindful to take your time at that stage and be prepared for a little improvisation if you have similar issues to me.
Clayton Ockerby
Jagdpanther G1 Early Production with zimmerit (no interior) limited edition incl the Schwerer Plattformwagen Type SSYS
From Takom
Kit no. #2125X
1/35th scale
1/35th scale
Price: £73.67 GBP/ $90.36 USD/ €81.06 EUR/ ¥9,090 JPY from Hobbylink Japan
Today: Build guide Pt III: Painting & Weathering 1/35th scale Jagdpanther G1 Early Production W/ Schwerer Plattformwagen Type SSYS
When last we visited this build, I had started to paint the rail car and primed the Jagdpanther, so it was ready for painting.
The tracks and wheels had been painted and assembled and a makeshift mask using tape and a tissue was placed around the tracks. Here’s a reminder to get you up to speed –
The model is treated to a base coat of AK Interactive – Dunkelgelb from the Real Color range. The tissue mask is removed and set aside to dry.
The camouflage pattern is copied from the colour schemes supplied in the kit as best I could by simply free-hand spraying Rotbraun and Olivgrun in a random manner.
The model is treated with a gloss varnish and the decals are set in place. Given my time again I probably should have set up a mask and sprayed these on because sitting the decals through the rough Zimmerit texture wasn’t ideal and I did encounter some silvering. I was planning on overpainting the numbers anyway in order to make them look a little more ‘field applied’, so I could address the silvering with paint down the track.
Details around the model were now picked out with a fine brush using Vallejo acrylics.
An oil wash using Sienna and Raw Umber is now applied to bring some depth to the recessed areas and start to define some of the shapes on the model. Using an irregular sponge and some of the Dunkelgelb colour, superficial chipping was applied in a dabbing motion. I concentrated around logical areas of wear and edges of panels.
The chipping process was repeated using a darker steel colour to simulate some deeper chipping.
Using a heavily thinned mix of Dark Grey and Rotbraun, additional depth was added by creating false shadows in deep, recessed areas and around details.
Streaking effects are now applied using enamel paints – rusty and buff colours are applied in fine lines working from the top of the panel down. Then using a flat brush moistened in white spirit the enamel paint is slowly removed by dragging it in a downward manner.
The effect should be subtle and will give a weathered and worn look to the panels you are working it into.
A paste of Earth toned pigment and enamel paints is now mixed up and applied to the model along the lower edges and wheels using an old brush. Very, very messy work…
A thinned Buff colour is sprayed along the lower edges of the model to simulate dust. It’s all about adding layers and creating depth.
In order to give the markings a more ‘organic’ look to them I overpainted the markings using a fine brush. This also gave me the opportunity to tidy up some of the issues I had with the decals silvering.
Further streaking is added to the top edges of the model. Again, using rusty tones of enamel paint and removing them in a downward motion with a flat brush and white spirit.
Exposed edges are now treated with the edge of a lead pencil to help similar bare, worn metal edges.
Using a static grass mix combined with some real-life plant material, the horizontal edges are dressed with the material and set in place using Sand and Gravel adhesive.
The leading edges of the tracks are now treated to the lead pencil as per the earlier steps.
Now back to the rail car. Rubble pigment is dry applied around the bed and set in place with a few drops of white spirit. Some darker earth tones were also integrated in smaller areas.
With a little pigment work, the bed of the carriage is starting to come together nicely.
Some stowage from the spares box is added to the deck and some bits and pieces are added to the rail car to give it some character. The timber planks and chocks were small pieces of Balsa wood stained using oil paint. I’ve seen images for tanks being transported on a rail car a few different ways. Some just seem to have a timber chock, some are fixed using cables and some don’t seem to have any fixings at all… So, I figured I’d be safe and secure my Jagdpanther with a couple of chocks and a tow cable for good measure. Accurate? Maybe. Plausible? I think so.
A picture of the finished kit from all angles...
ConclusionI had a bit of a roller coaster ride with this model. I had moments where I loved it and others where I was hating it. Hating it as in the direction I was taking it more so than the model itself. More about me than the model.
As mentioned in the build review, there were some fit issues with the rear deck section as well as the way the gun assembly came together with the shell, but I guess that is model building, right? Just be mindful to take your time at that stage and be prepared for a little improvisation if you have similar issues to me.
A few of the close-up details of the finished kit...
There is a lot about this model to get excited about. Some exquisite, fine detail in the moulding and a good choice of schemes, and of course the inclusion of the railcar in the release is a real bonus. And at the end of the day, the Jagdpanther is just a cool looking beast and should be in everyone’s collection.
Some close-ups of the rail platform, deck and running gear...
Don’t be mistaken that just because there is no interior in the kit that this will be a quick project. There is still a lot of hours in building and painting this kit and once complete really can present very nicely.
Remember, this is a limited release boxing of the Jagdpanther and the Plattformwagen, so if this appeals to you then now would be a good time to get your hands on the kit. Clayton Ockerby
Thanks to Takom for this kit to build and review
See more of Clayton's amazing works on his modelling website "Workbench Hobbies" or his FB page


