.webp)
Lukáš is back with part one of his build guide of ICM's 35th scale FWD Type B WWI US Ammunition Truck. He loves his WWI machines, & you can see his passion in his work in Pt.1 in the news today....
.webp)
FWD Type B - WWI US Ammunition Truck
From ICM Models
1/35th scale
Item number: #35656
223 parts
Model dimensions: 157mm long x 69mm high.

The Subject: FWD Type B WWI US Ammunition Truck
The American company FWD (Four Wheel Drive Auto Company) was once an innovative enterprise that developed and produced four-wheel-drive vehicles. One of these cars, the 3-ton FWD Type B truck, had a classic hoodless layout with the driver’s position above the engine compartment. The driver was located directly on the hood of the 4-cylinder engine with a capacity of 36 hp, the radiator was located in front of the cabin.
.webp)
During World War I, the U.S. Army ordered 15,000 of these vehicles, known as the “Truck, 3-ton, Model 1917.” In fact, over 14,000 units were delivered, with additional orders coming from Great Britain and Russia. At the same time, the U.S. Ordnance Department developed a body model for transporting ammunition, and some FWD Type B vehicles were equipped with similar bodies.
A restored version of the truck below, in similar markings to the ones chosen in this build...
.webp)
These ammunition transporters were used by the American Expeditionary Forces in Europe, where they carried artillery shells and various equipment. Additionally, they were involved in towing artillery pieces.
.webp)
Build guide Pt.I: ICM's 35th scale FWD Type B WWI US Ammunition Truck - Construction & paint...
It’s fair to say that it’s been a while since I contributed a review and even longer since I started this one. As usual, I decided to enhance the kit in some parts, which made my life more complicated with regular delays and problems that I couldn’t reverse. That said, I hope you enjoy what you see below.
As with any of these trucks or buses, I started with the chassis. As the build progressed, it became apparent that my main issue would be handling the kit without constantly breaking the small parts connecting various components, such as the steering and axles.
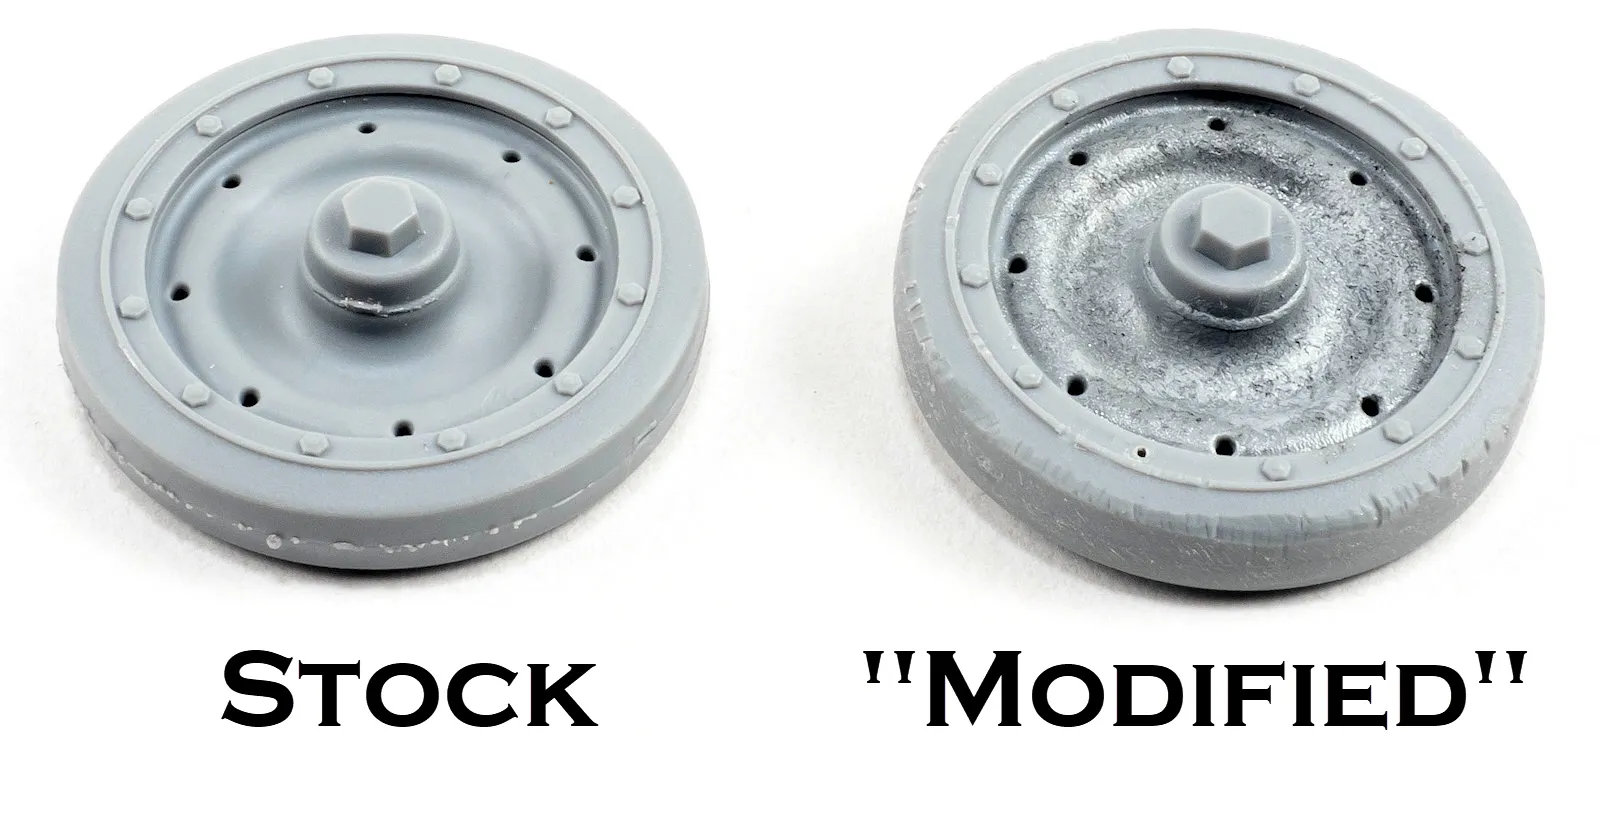
 As mentioned above, I started enhancing some smaller parts by adding more textures. Here, I decided to roughen up the rubber on the wheels and add some metal texture using Tamiya putty. The idea is to create a better platform for weathering later on.
 With the chassis and main components of it test fitted, the part of the build I was most excited about was next.

 I wanted to make the textures and features of the material more pronounced, so I drilled the holes as per the instruction sheet and thinned out the plastic behind them. I then enhanced the shape by gently bending it inwards where the string would be pulling it tighter. The same thing was done at the front and back, and I re-scribed to show overlapping fabric. I also added some patches imitating field repairs at this point.
 By far the most time-consuming task was replacing the eyelets on the side of the ammunition box. These are nicely represented but can’t be realistically shown with a string securing the tarp to the box. The instruction sheet has a diagram for rigging, but you can’t really do it as there isn’t a physical hole to rig them through.
 After much thought, I came up with a solution. I created eyelets out of thin wire and used thin strips of masking tape to make the strap that attaches it to the ammunition box.

 Before starting on the cab, or more accurately, the open top, I opened the side to make the engine visible and created some rough openings on the other side that wouldn’t be blocked by the storage box. It was pretty rough, but I hoped that painting and weathering would help later in the process.
 Next, I applied a quick coat of mahogany Surfacer from Mr. Hobby on the chassis and black Surfacer on the engine.

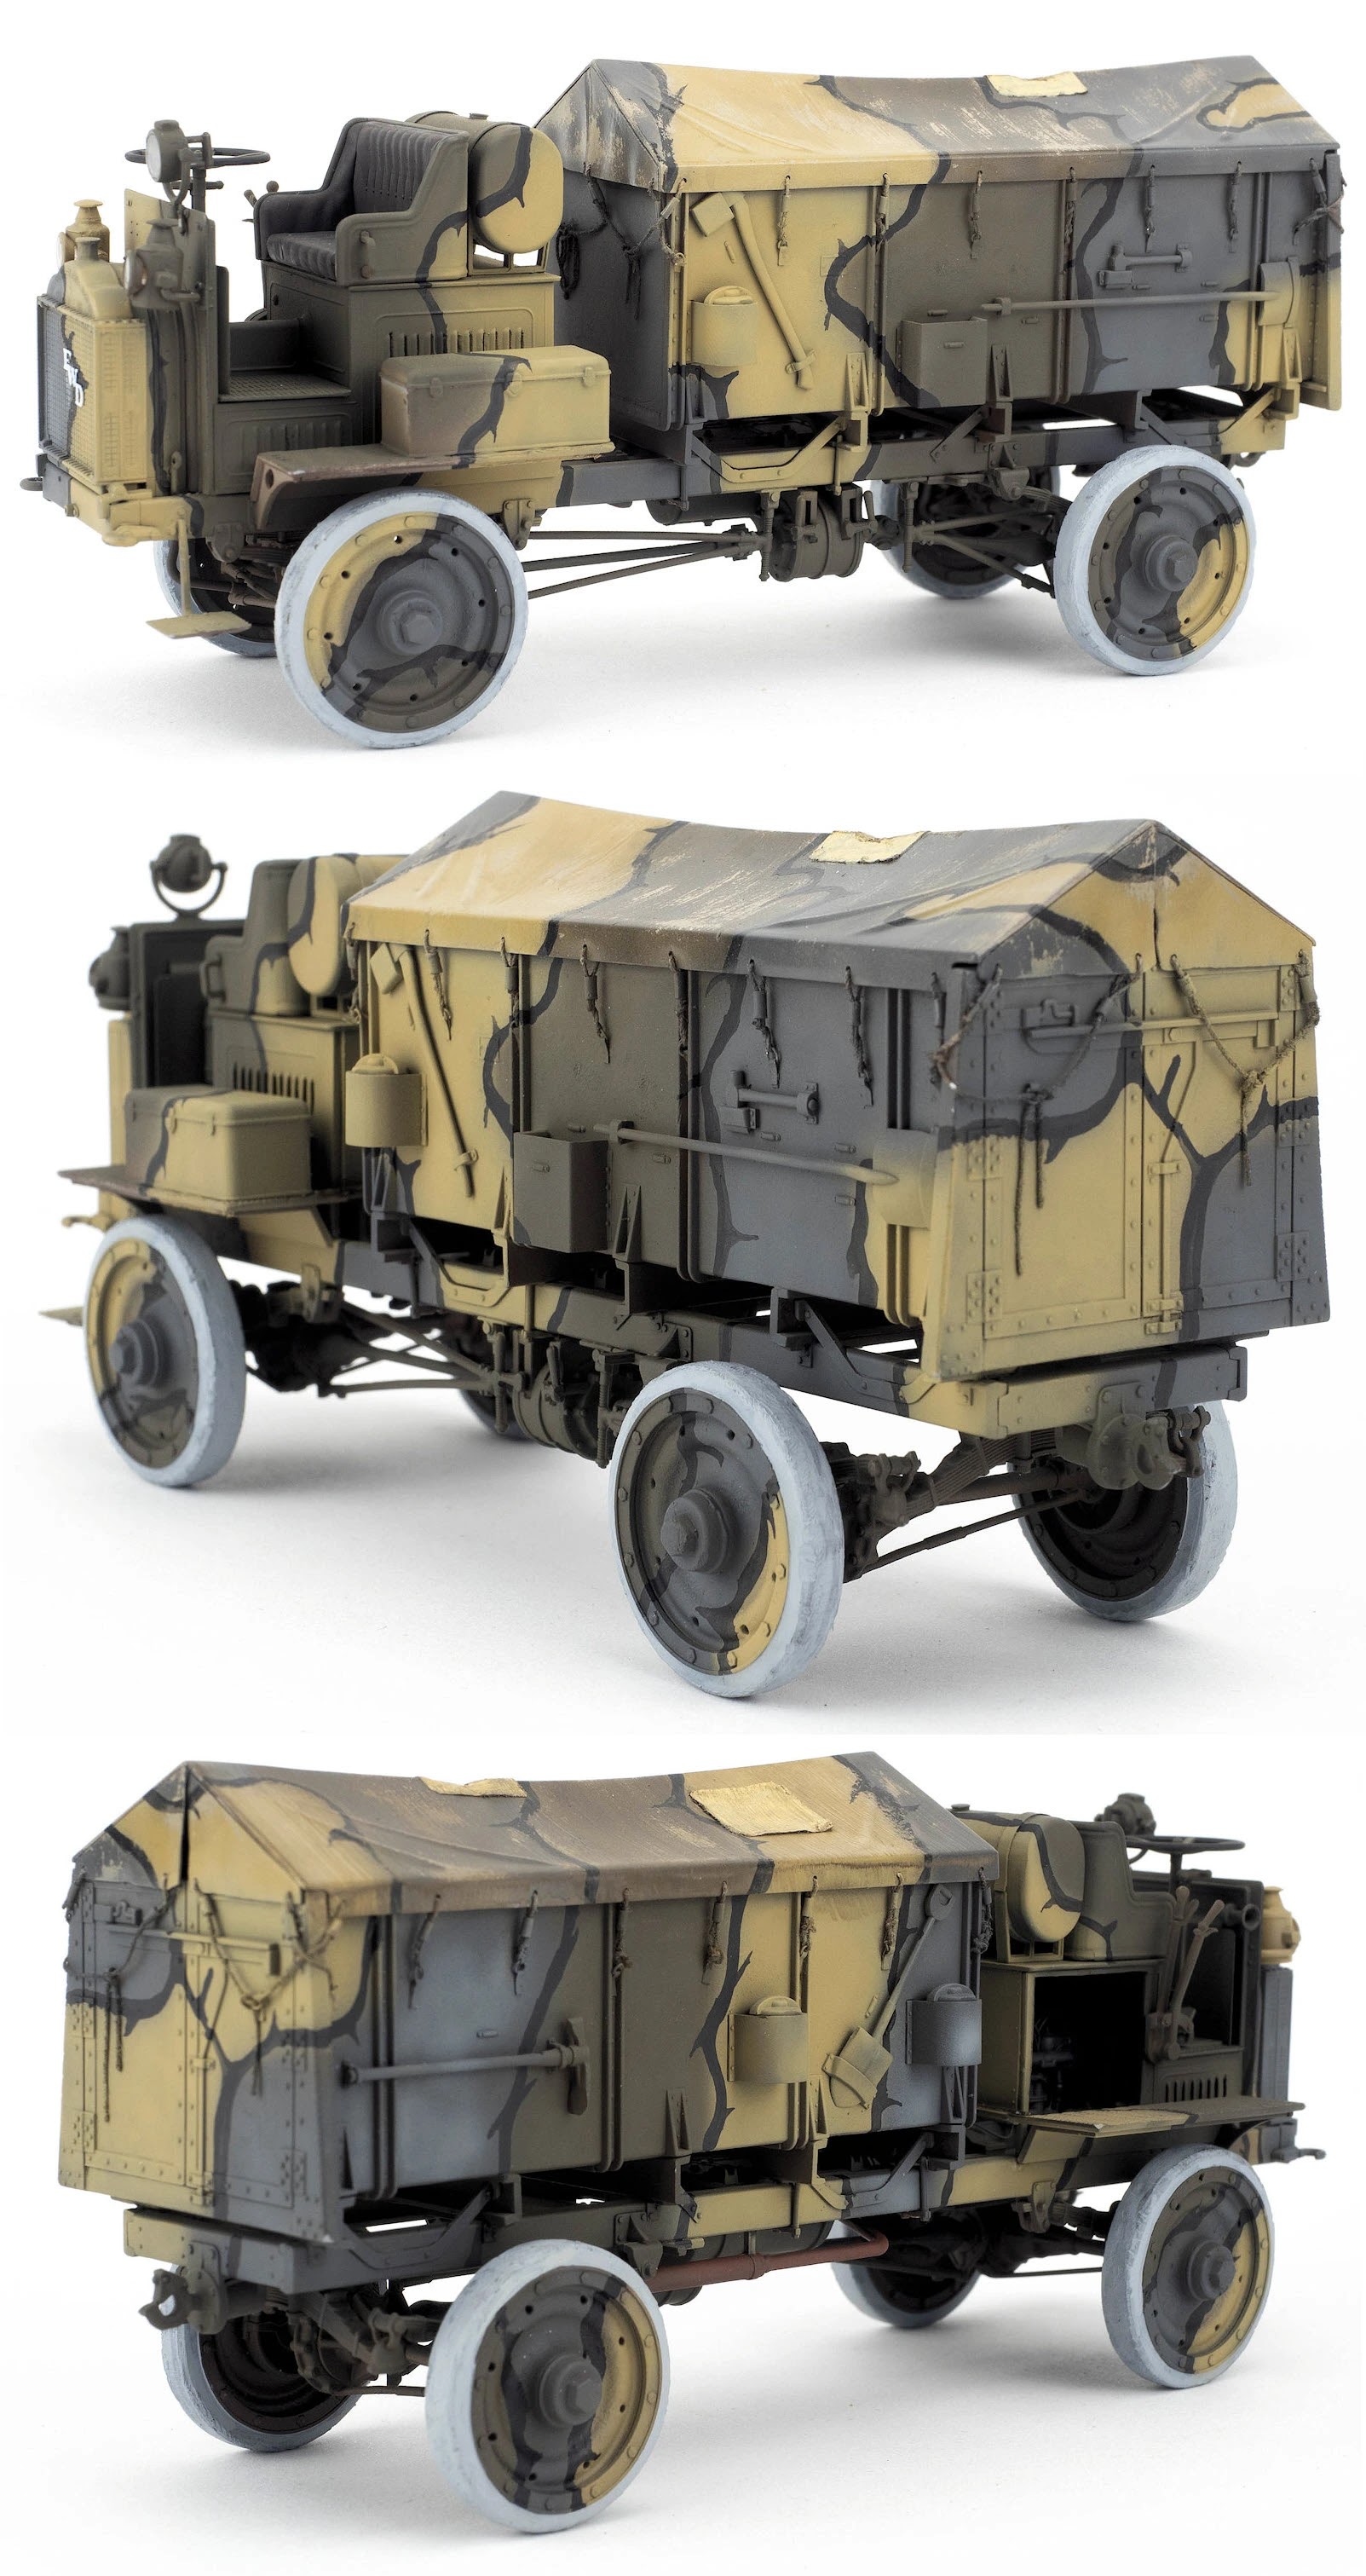
 Since I decided on a camouflaged scheme, I went ahead and glued the main components together. This also included fixing the gap that is terribly visible in these two photos.
 With that gap fixed, the entire truck received a coat of mahogany primer and base green. Once that was done, I turned my attention to the tarp, which I sprayed with flat fabric colour. When it dried, I applied a generous coat of AK Heavy chipping agent.
 I used a pencil to outline the camouflage on the entire vehicle and proceeded with airbrushing the canvas. It was all freehand, as the plan was to hand-paint the black lines between each field later on. For the paints, I used ICM’s colour codes and came up with similar-looking tones using Tamiya acrylics. I wasn’t too worried about exact shades, as weathering would change that later on. It was more about the effect rather than 100% accuracy. No point in dwelling on that too long, as it can get controversial quickly.


 The rest of the truck followed, all hands-free. At this point, I was a bit worried that my paints would be all over the place. Luckily, the overspray wasn’t too bad for my lack of practice and could be corrected later on.

 It was at this point that I decided to attach the wheels. This reduced the rate of breaking things off significantly but increased the painting difficulty a notch.

 When I was asked a while ago if I was keen to build this new kit, I was both surprised and very interested. I enjoy WWI subjects, and this is a great-looking truck that was only available as a resin kit until this release. Although one has to be careful handling it during the build due to its fragile construction, it definitely pays off once finished.


The tarp covering the ammunition area looks great from the kit.


Now the rigging has begun. Perhaps a bit over scale I still prefer this over the original plastic.


The engine received some basic wiring. If anyone has a good picture of the engine and all the hoses, I’d love to see it for my next build.

Here are the main components with various levels of primers. At this point I only use the primer to see what needs further attention and more work.


Tap water was next and it helped me nicely with creating that distressed canvas look.

Even better, I could still use the chipping fluid after I hand painted the black lines that divide each paint field.


More hand painting of black and visibly needed to do some back and forth as the lines were bit off.


Some details are painted and ready for oils to finish it off later on when weathering comes to play.

This part of the build is done. In the next article, I’ll finish all the details, weathering, and integrate this nice little truck into a small vignette.
Stand by for Part II, coming soon...
Lukáš Kašuba

Lukáš Kašuba
You can see more of Lukáš' work on his Facebook page - Lukasthelight Miniatures
Many thanks to ICM plastic model kits for supplying the kit for Lukáš to review.
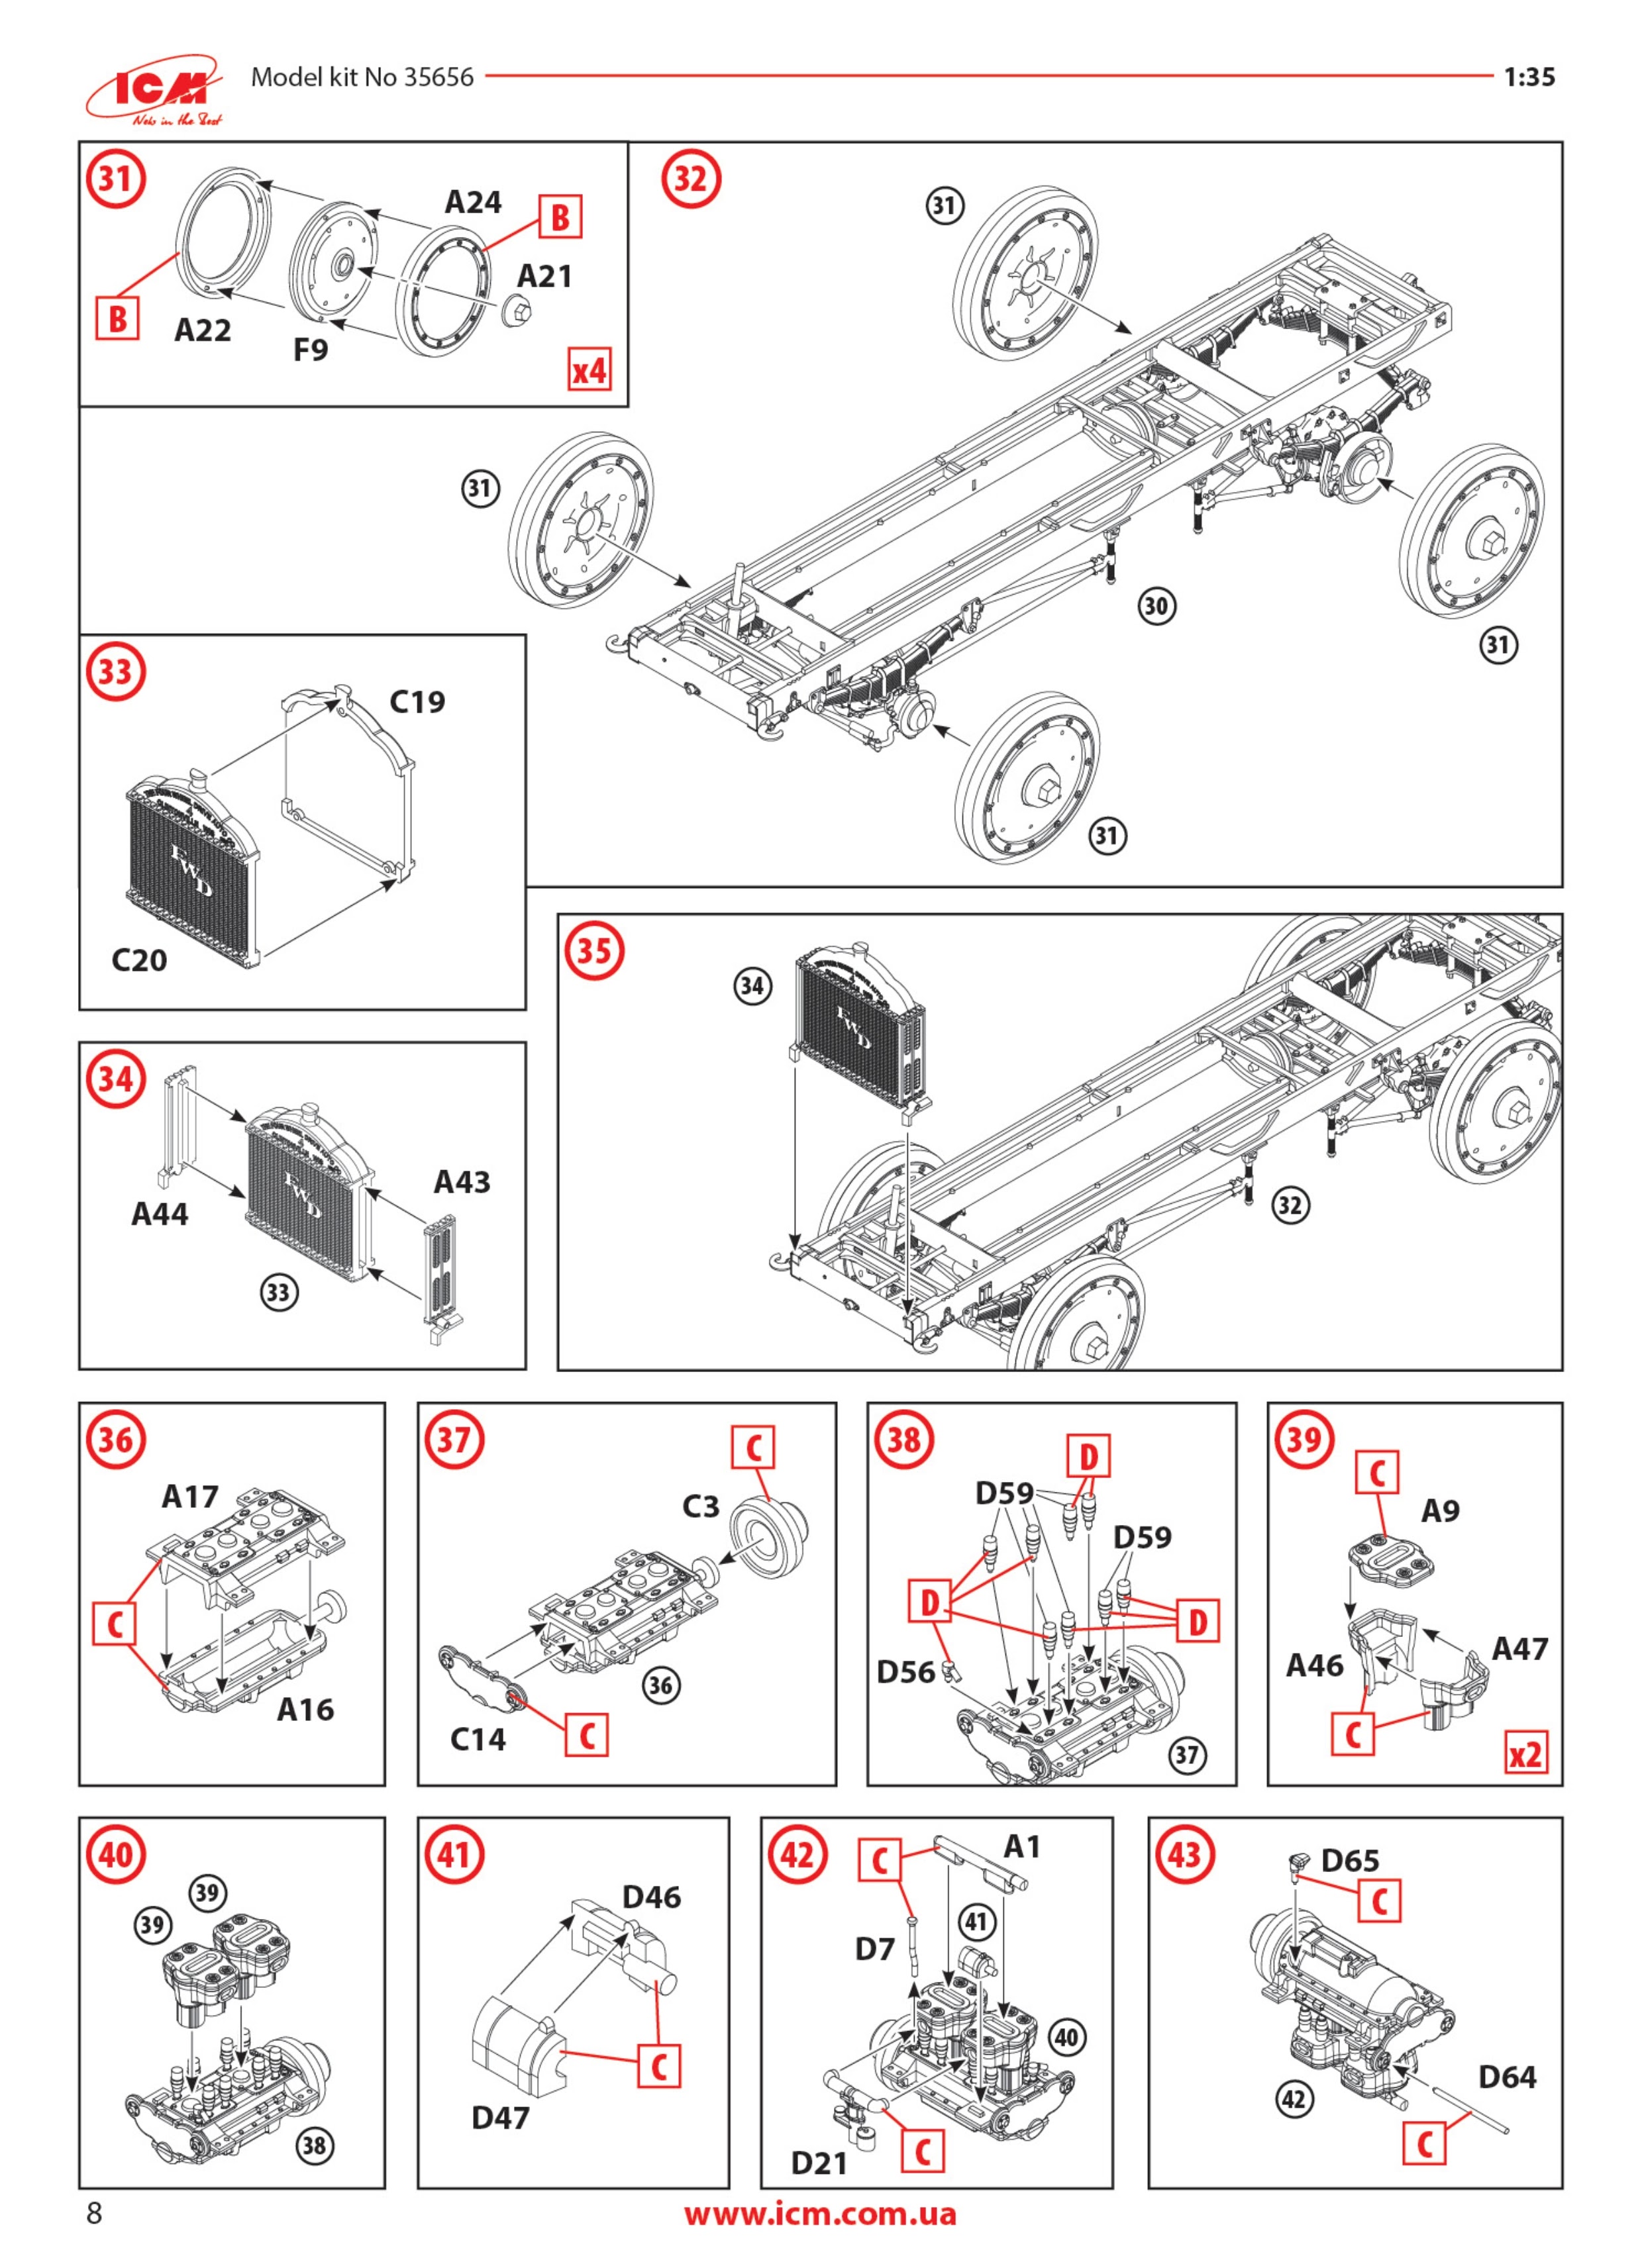
Kit Instructions: